I have wanted to build a Pip-Boy for years.
Not a cosplay prop with a dead screen glued into a 3D-printed shell. Not a phone holder pretending to be a wearable computer. A real little machine: time on the screen, physical buttons, ePaper refreshes, battery power, and just enough retro-futuristic attitude to feel like something salvaged from the Fallout universe.
So I finally started building one.
The current prototype uses a Seeed Studio XIAO ePaper Display Board (nRF52840) and a 2.13-inch quad-color ePaper panel with black, white, red, and yellow. The battery and final case are still a work in progress, but the important part is already real: the screen works, the interface is on the display, and the clock now runs with live time instead of a static mockup.
Why this display
The 2.13-inch panel is a weirdly good fit for a Pip-Boy-inspired build.
It is small enough to feel like a wearable device, but large enough to show a bold clock face plus status information. The four-color palette also pushes the visual design in a more stylized direction than a typical black-and-white ePaper panel. I ended up leaning into a palette that feels half terminal, half warning label:
- black time block
- white primary text
- red background panels
- yellow accents and frame lines
That color combination is not canon Fallout green, obviously. But on this particular display it works better than trying to force a monochrome imitation of the in-game UI.
The First Surprise: the “official” path was not the working path
On paper, this should have been straightforward. Seeed provides its own display stack, board support, and example setups. In practice, the first serious chunk of work was simply getting the panel to display anything reliable on the EN04 / nRF52840 board.
The turning point was realizing that the path that should have worked was not the path that did work.
The setup I ended up trusting was:
GxEPD2- manual EN04 pin mapping
- explicit ePaper power enable on
D6 - the correct panel class for the quad-color display
Once that clicked, the screen finally came alive.
That was one of those deeply satisfying hardware moments: after several dead-end attempts, the display suddenly does a proper refresh and you realize the project is real now.
Designing the UI on a display that does not forgive laziness
A fast LCD will let you get away with sloppy layout decisions. This panel absolutely will not.
The visible area is tight, the refresh is slow, and every pixel matters. On top of that, a UI that looks fine in a clean SVG preview can still land awkwardly on the real panel because the display margins, glyph sizes, and box spacing feel different in hardware than they do in a browser.
So the interface went through a lot of iterations.
I started with SVG mockups and slowly moved toward something denser and more readable. The biggest design lessons were surprisingly physical:
- The time block needs to dominate the screen.
- Tiny offsets matter. One or two pixels can make a row feel broken.
- If a box exists, its text has to sit inside the box with intention.
- High contrast beats cleverness on ePaper.
This was one of the key render directions during the design phase:

And this is the real hardware prototype once the layout finally started to behave:
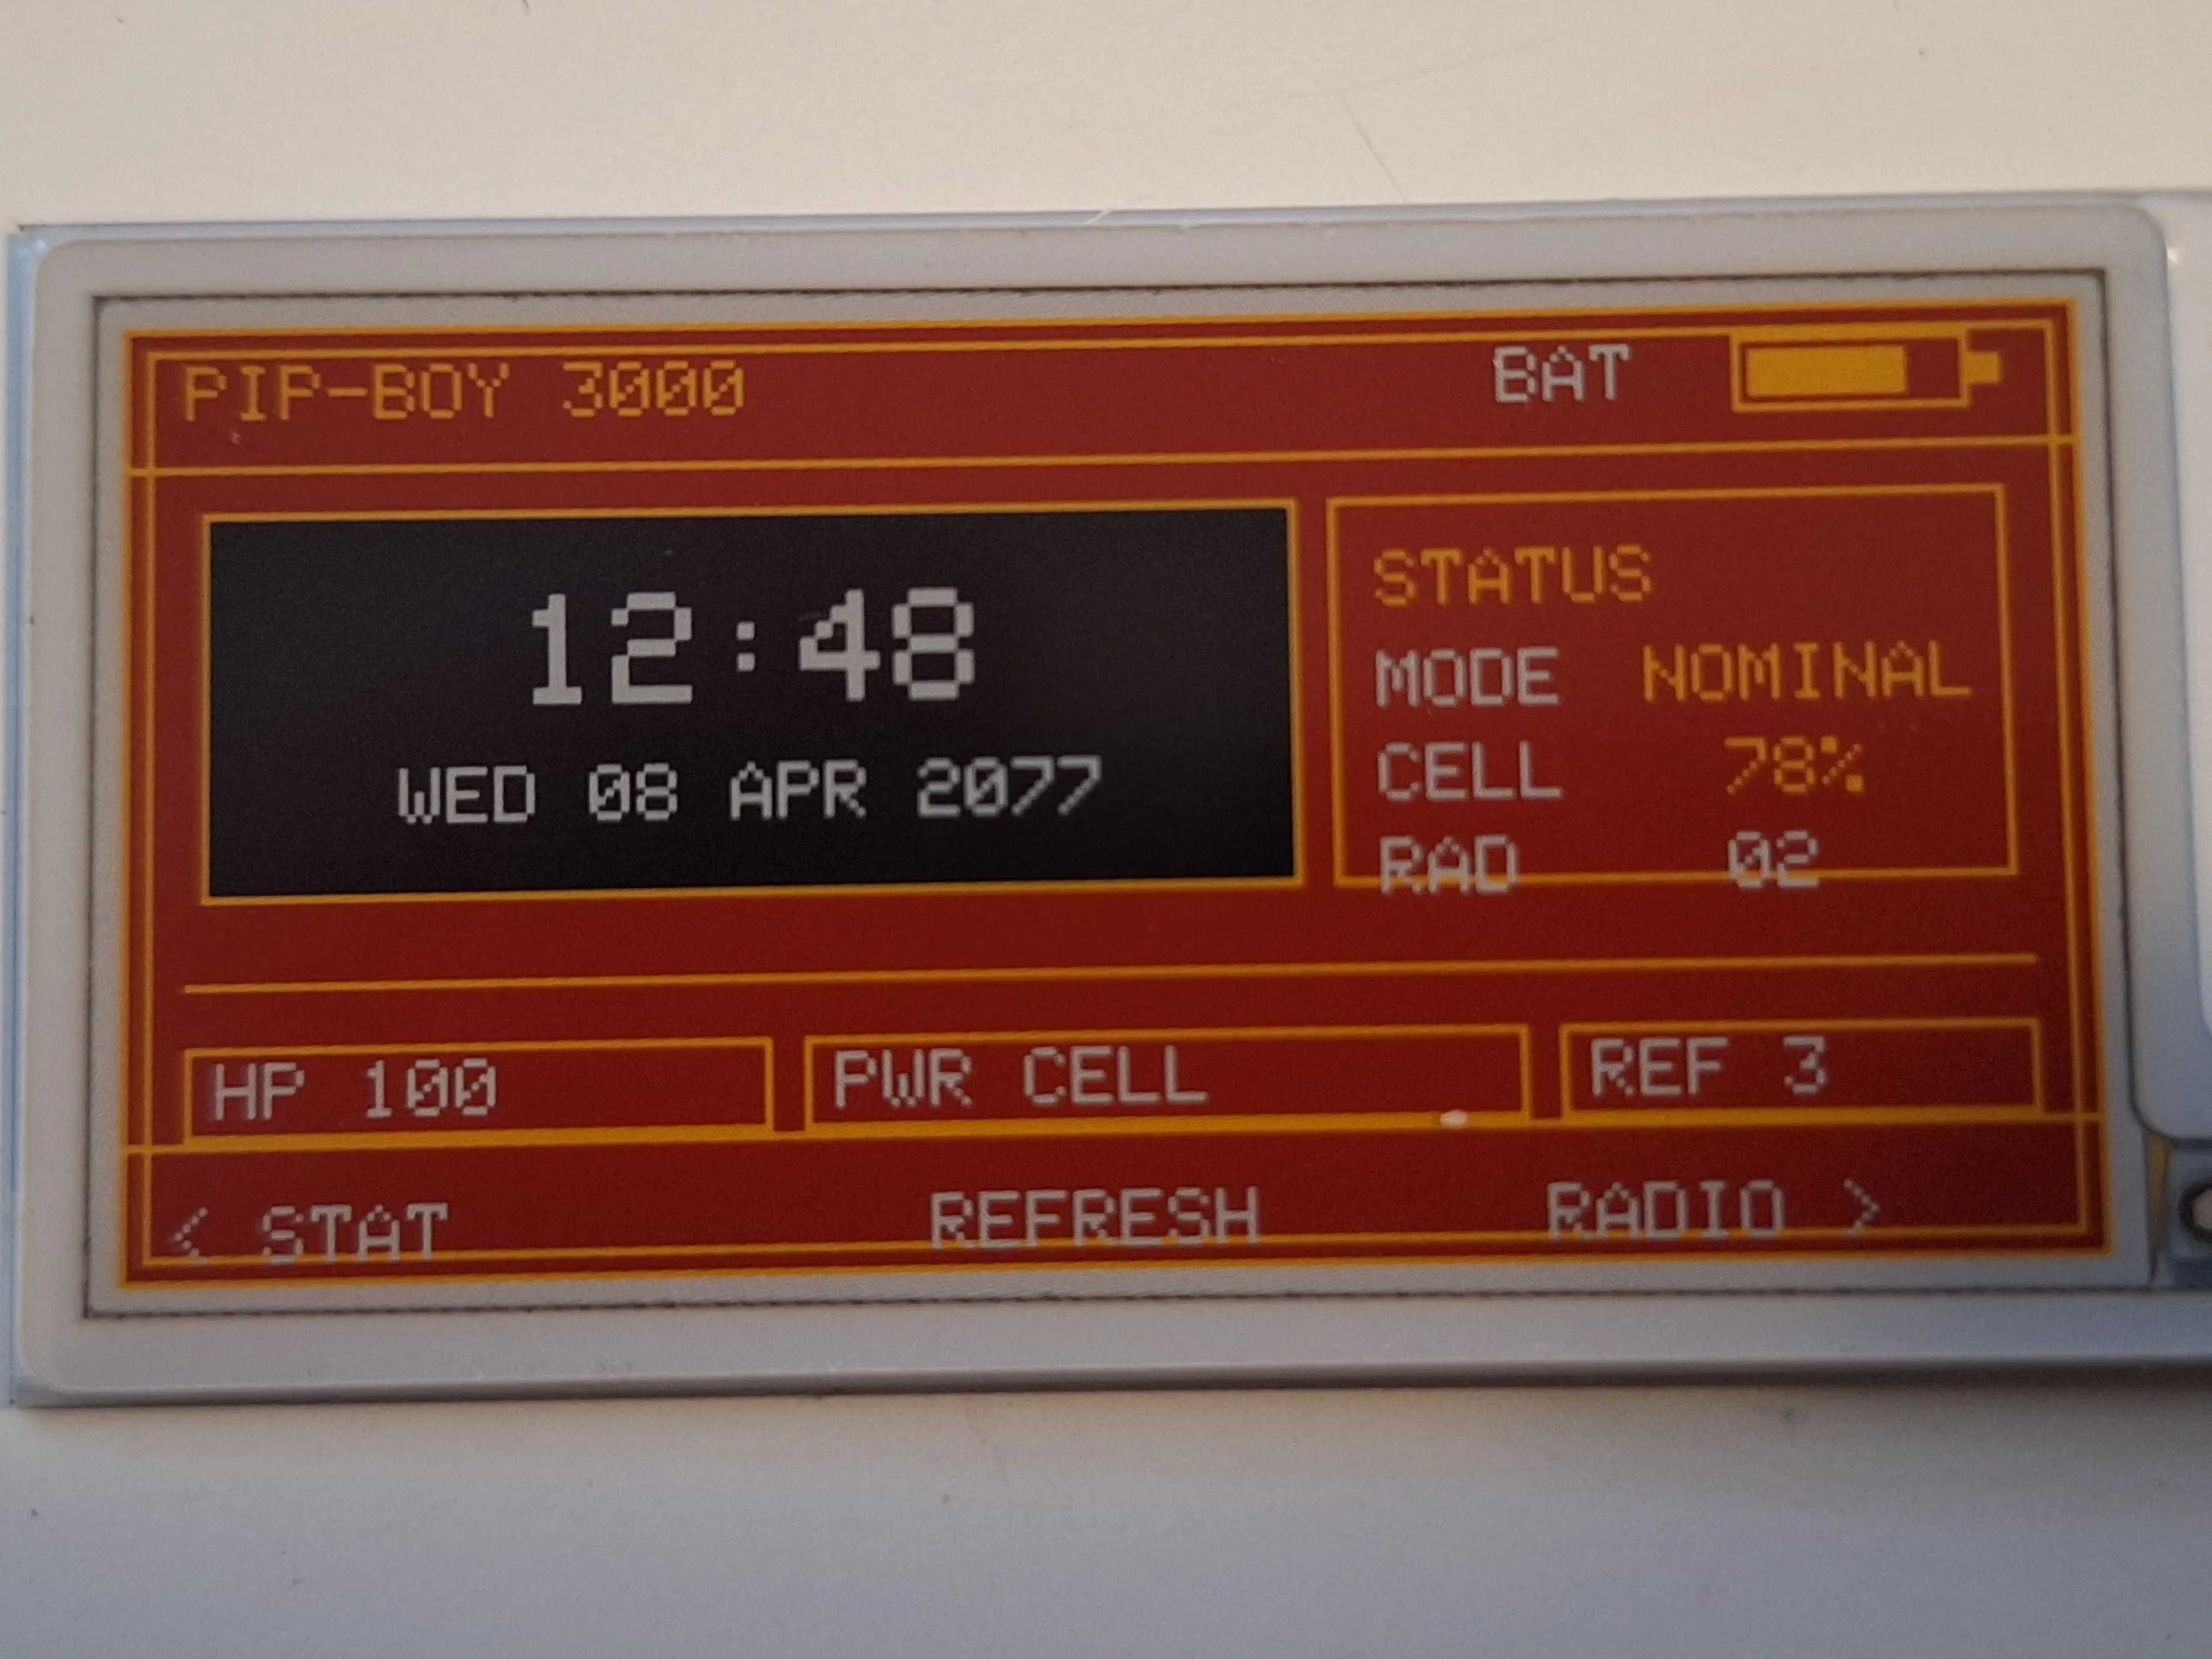
The layout tuning rabbit hole
The funniest part of the UI work is that the last 10 percent took as much emotional energy as the first 70.
At some point the interface was technically there, but almost every element was slightly wrong:
- the header sat too high
- the battery row looked detached
- the status block drifted downward
- the footer clipped against the frame
- the clock looked centered in theory, but not in practice
That phase was less “design” and more “arguing with geometry.”
I ended up rewriting the text placement so elements were positioned relative to their containing boxes instead of by loose cursor coordinates. That sounds small, but it was the difference between “prototype” and “this actually looks intentional.”
Real time, finally
The first working screens used fixed mock values, which was enough for bring-up and design iteration. After the layout stabilized, I added the first live clock implementation.
Right now the firmware seeds time from the build timestamp and keeps it running with millis(), updating the ePaper only when the minute changes. That is not the final timekeeping solution, but it is exactly the right level of practical for this stage of the project:
- enough to make the device feel alive
- no extra RTC module yet
- no unnecessary complexity before the rest of the hardware is proven
The next step will probably be one of three options:
- manual time setting with buttons
- USB or BLE time sync
- a dedicated RTC for proper persistence across power loss
What is still missing
This is a real prototype, but not yet a finished wearable.
Still on the list:
- battery validation with the correct connector and wiring
- button-driven screen switching and time setting
- low-power behavior
- a 3D-printed enclosure that actually feels like a Pip-Boy, not just a dev board with a screen attached
That last part matters more than it sounds. The enclosure will decide whether this ends up looking like a maker project or an object with personality.
Why I love projects like this
This kind of build sits in a sweet spot I enjoy a lot: not quite embedded engineering, not quite interface design, not quite prop making, but borrowing a little from all three.
It also scratches a very specific itch: turning a fictional object into something that has to obey real constraints. Real connectors. Real refresh times. Real battery problems. Real pixels that do not care what the mockup looked like.
That tension is the fun part.
A Pip-Boy in a game can animate, glow, and respond instantly. A Pip-Boy in the real world has a slow quad-color ePaper panel and a board that makes you earn every successful refresh. And honestly, that makes it more interesting.
The plan from here
The hardware base now works. The display works. The design direction works. The clock works.
So the next chapter is straightforward:
- finish the core firmware behavior,
- validate battery power properly,
- build the enclosure,
- turn the prototype into something wearable.
If all goes well, this project will eventually stop being “a small dev board on my desk” and start becoming an actual Pip-Boy-style wrist clock.
And yes, when the 3D-printed shell is ready, I will absolutely write a follow-up.