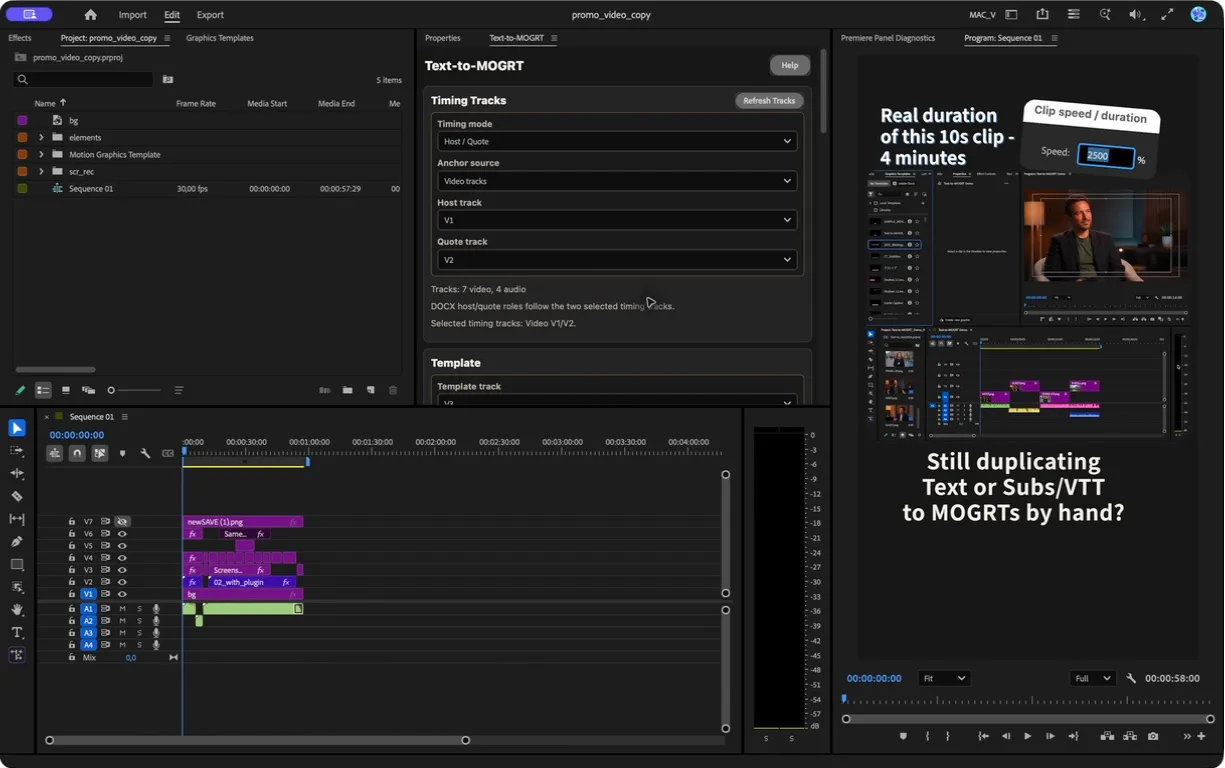
The short version
From source file to finished timeline in five steps
Already familiar with Premiere tracks and MOGRTs? This is the complete workflow at a glance.
- 01Prepare an empty output track
Keep every planned subtitle range clear. The plugin never creates tracks and never overwrites existing clips.
- 02Open Text-to-MOGRT
In Premiere, go to Window → UXP Plugins → Text-to-MOGRT.
- 03Choose timing and a MOGRT
Use timeline timing tracks for DOCX/TXT, or cue timecodes for SRT/VTT. Then read a timeline template or choose a MOGRT file.
- 04Preview the batch
Check the planned clip count, source, timing, wrapping, warnings, and output track. Preview does not change the timeline.
- 05Insert and review
Click Insert Batch, inspect the result in Premiere, and review the timeline before your final export.
Work in a copy of your project until the template, track choices, line count, and wrapping look exactly right.
Before you start
What you need
Premiere Pro
Adobe Premiere Pro 25.6.0 or later on macOS or Windows 10/11 x64.
A subtitle source
A local .docx, .txt, .srt, or .vtt file.
A prepared MOGRT
Place it on a template track, choose a local .mogrt, or select an installed template.
An empty output track
Create it in advance. The plugin inserts only into the track you explicitly select.
Choose your source mode
Where should timing come from?
Step 1
Prepare the sequence and timing tracks
Open the sequence you want to edit before configuring the panel. Track menus always refer to the active sequence.
Open the target sequence
Select its timeline and confirm it is the active sequence in Premiere.
Create or choose the output track
The track must already exist. Make sure it has no clips inside any range where subtitles will be placed.
Prepare timing tracks for DOCX/TXT
Place host and quote timing clips on two video or audio tracks. Their occupied ranges define when text appears.
Refresh after changing tracks
If you add or remove a track after opening the panel, click Refresh Tracks. A removed selection appears as Vn (missing) until you select a valid track.
When both selected timing tracks share a gap, Text-to-MOGRT leaves that gap subtitle-free instead of filling it automatically.
Step 2
Choose the MOGRT that defines the look
Text-to-MOGRT uses your template for typography, placement, background, animation, and other supported controls.
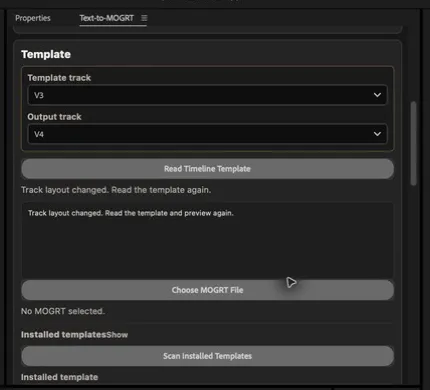
Read a timeline template
Put one prepared MOGRT on the selected template track, choose that track and the output track, then click Read Timeline Template.
Choose a local MOGRT
Click Choose MOGRT File and select a local .mogrt. The plugin remembers this selection between sessions.
Use an installed template
Click Scan Installed Templates. On first use, Premiere may ask you to choose the installed-MOGRT folder shown in the panel.
A timeline template must be read again after reopening Premiere. A remembered local or installed MOGRT is restored automatically if it is still available.
Step 3
Choose the workflow that matches your source
Timeline-based timing
Document / Text
DOCXTXTUse this mode when the timing already exists as clips in your sequence. The text is distributed across the occupied ranges of two selected tracks.
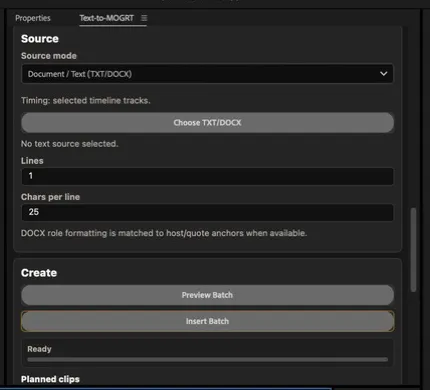
- Select Document / Text under Source mode.
- Under Timing Tracks, choose Host / Quote or Simple, then choose video or audio and the two timing tracks.
- Click Choose TXT/DOCX and select your file.
- Set Lines and Chars per line.
- Click Preview Batch and review the plan before insertion.
Host / Quote
Regular or bold DOCX text follows the first timing track. Italic text follows the second. Mixed formatting stays in source order.
Simple
Ignores DOCX role formatting and distributes all text, in source order, over the combined occupied ranges of both tracks.
TXT and unformatted DOCX: content uses the combined timing span of both selected tracks. If both tracks are empty, Preview stops with an error.
Cue-based timing
Timed Subtitles
SRTVTTUse this mode when the subtitle file already contains timecodes. Host and quote timing tracks are not used.
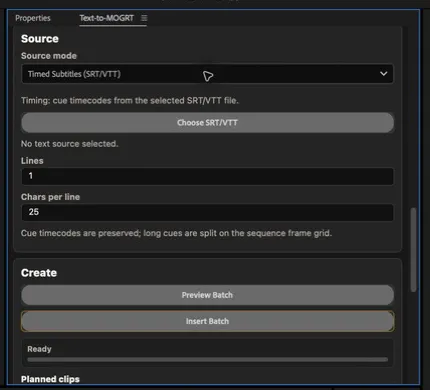
- Select Timed Subtitles under Source mode.
- Click Choose SRT/VTT and select your subtitle file.
- Set Lines and Chars per line.
- Click Preview Batch and verify cue timing and planned clips.
- Click Insert Batch when the preview is correct.
Long cues are split into adjacent, frame-aligned MOGRT clips while preserving the cue's original time range. Invalid or overlapping cues are reported as errors and are never silently treated as plain text.
Lines sets the maximum lines per clip. Chars per line is a readability target—not a reason to damage words. A word can stay whole up to 1.5× the target; only longer tokens are hard-split.
Steps 4–5
Preview first. Insert only when the plan is right.
The preview is your safety checkpoint. It calculates the complete batch without changing the timeline.
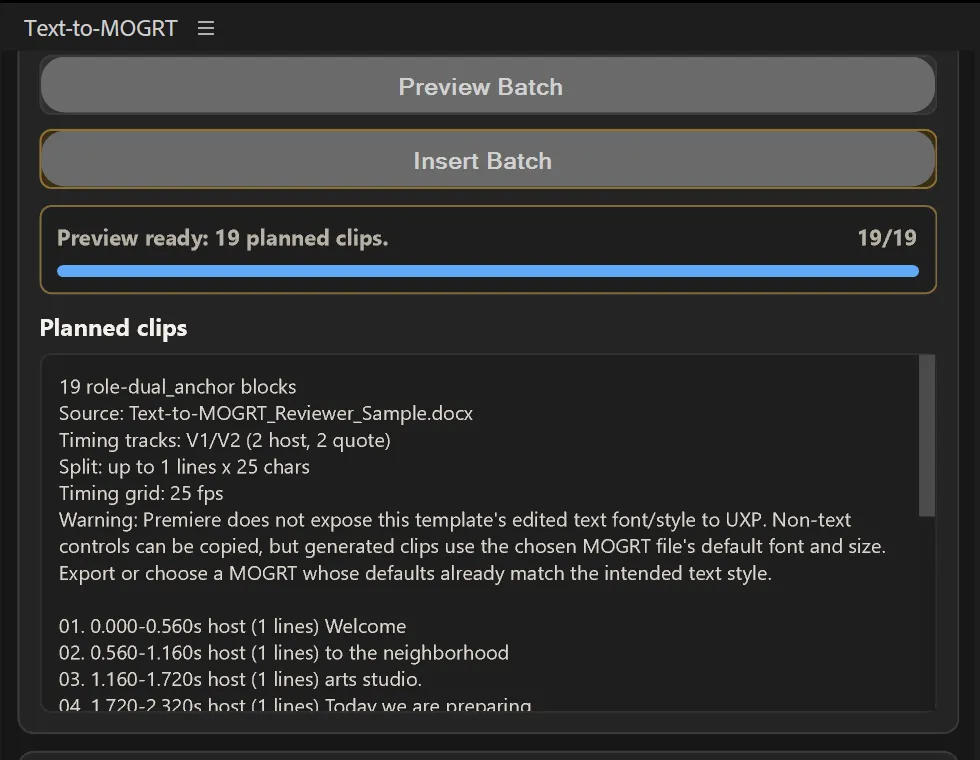
Before Insert Batch
Check these five things
- Source file and source mode
- Template and output tracks
- Planned clip count and timing
- Lines, wrapping, and text order
- Warnings about the selected MOGRT
After insertion
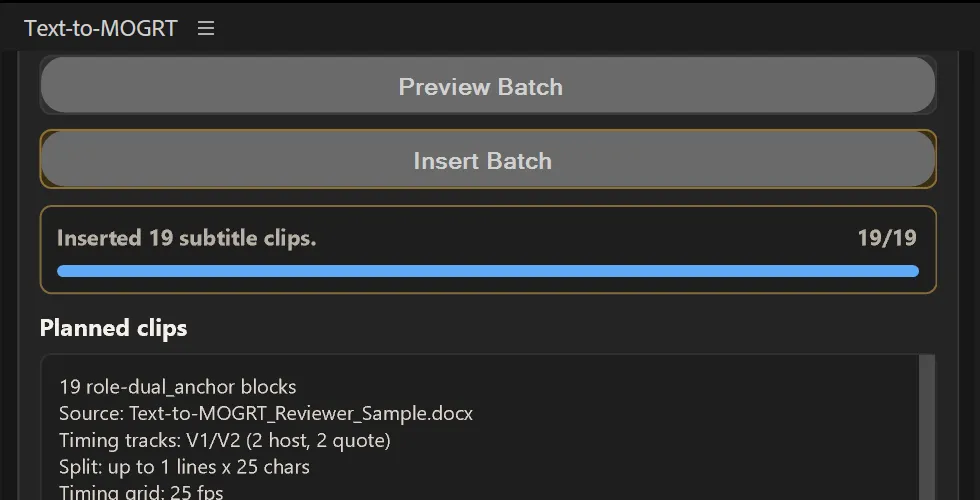
Confirm the success count, then inspect the timeline.
The panel reports how many subtitle clips were inserted. Play through representative sections and review the full sequence before export.
Template compatibility
Important MOGRT notes
Font family and size
Premiere does not expose the edited font family or font size of some After Effects MOGRT text controls to UXP. In that case, generated clips use the defaults saved inside the selected .mogrt.
One text field
Standard one-field MOGRTs accept wrapped multiline text. Use Lines to control how many lines each generated clip may contain.
Two one-line fields
Version 1.1.7 supports Premiere-authored MOGRTs with exactly two independent one-line text fields when Lines = 2. Line 1 and line 2 are routed to their matching fields.
Unsupported layouts stop safely
Lines = 1 on a two-field template, more than two editable text fields, or an ambiguous field layout stops before files or timeline clips are created.
Built for cautious editing
Safety, recovery, and privacy
Preview is read-only
It plans the batch but does not alter the timeline.
No overwriting
An occupied output range cancels insertion before any timeline change.
Automatic rollback
If a batch fails after insertion begins, the plugin removes only clips created by that run.
Offline processing
Sources, timeline data, settings, and generated subtitles remain on your device.
Troubleshooting
Fast fixes for common problems
No sequence or the track menus are out of date
Select the target sequence in Premiere, return focus to the panel, and click Refresh Tracks. After a real track-layout change, read the timeline template and preview again.
The generated subtitles use the wrong styling
Choose the correct template track and click Read Timeline Template again. If only the font family or size is wrong, save the intended defaults inside the source MOGRT and reselect it.
The saved MOGRT is unavailable
The file may have moved, been renamed, or lost permission. Click Choose MOGRT File and select it again.
An SRT or VTT file is rejected
Correct malformed or overlapping cues. Text-to-MOGRT fails safely instead of falling back to plain-text timing.
Insert Batch says the output range is occupied
Select another existing output track or clear the conflicting clips from the planned ranges, then run Preview Batch again.
DOCX host and quote text goes to the wrong timing
Check the document formatting: regular or bold text is host text; italic text is quote text. Or select Simple if you want formatting ignored.
I want to clear remembered settings
Open Support and click Reset Saved Settings. This clears the remembered MOGRT, track choices, source mode, and layout values. Source documents are never remembered.
Still stuck?
Send a support report.
Open Support in the panel, click Copy Support Report, and include what you were doing when the problem appeared.